How To Grow Potatoes in A Bag Easily in Small Spaces & Turn 3 Potatoes Into 30! Step-By-Step
Step-By-Step Instructions to Grow Your Own Potatoes in A Bag for An Easy, Inexpensive, Home-Grown Potato Harvest
It’s no surprise that everyone has been spending more time at home these days, but people are not just nesting. Everyone, it seems, is increasingly embracing old-fashioned DIY, self sufficiency. And nowhere is that more evident than in the grow-your-own-food movement. Is that possible if you don’t have a garden and have limited space? Absolutely! Today, the focus is on that versatile, much-loved diet staple, the potato, and how surprisingly easy it is to grow with only a simple bag, or box, and a small patio or deck. No acres of land are required, only a bit of time and patience. So, to find out how you can turn a mere three to five potatoes into 30 to 50 potatoes, just keep reading…
Why Grow Your Own Potatoes In A Bag? Control What You Grow & Save Money Doing It
First off, let’s just be practical and talk numbers here. Growing potatoes in bags allows you to take, say, three to five potatoes, and multiply them ten-fold into thirty to fifty potatoes! I’d say that’s a pretty amazing yield with little effort, some sunshine and water, and very little space…
There are many more reasons to do as our grandparents did and grow our own produce, from concerns about pesticides and bacterial outbreaks to shortages and the rising cost of food items. It is natural to want to have some control over the conditions around which your food is grown. Plus, the option to do so shouldn’t just be limited just to those lucky enough to have land. Since, space is at a premium for many of us, in this ongoing “homesteading” series, I try to focus on crops you can grow, no matter whether your home is a house, condo or an apartment with little to no space.
As you plan your kitchen garden, also discover how easy it is to grow the only tomatoes worth eating – homegrown ones – with little to no space by using pots here.
Read on to learn how to grow your own potatoes in a bag with just a small deck, porch or patio.
What Kind Of Bags Can You Grow Potatoes In?
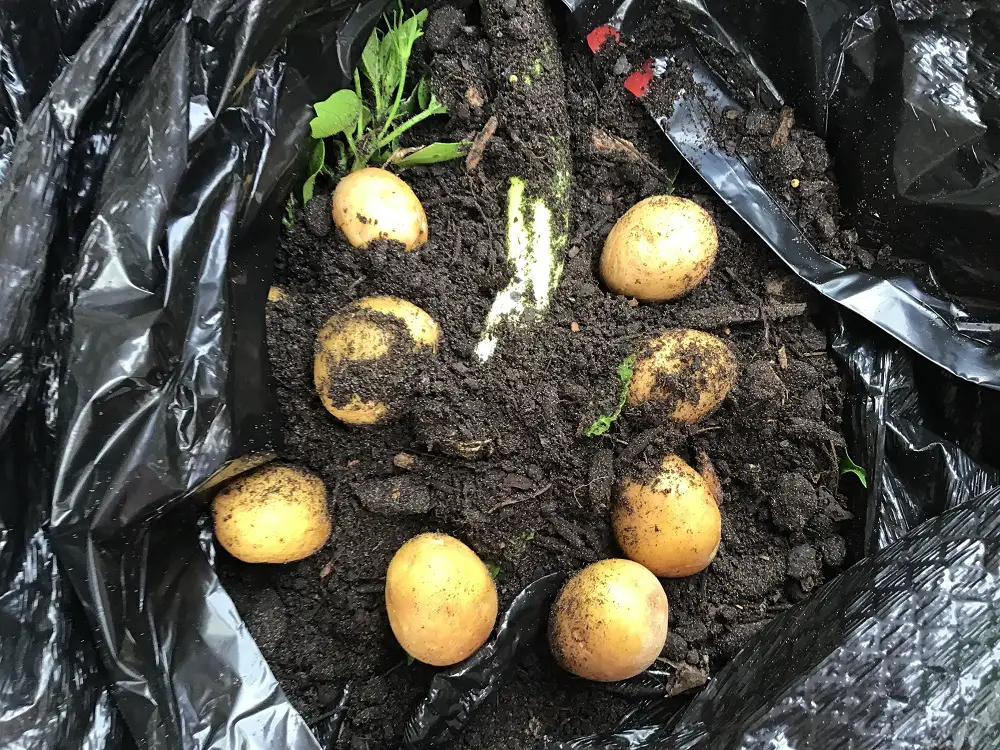
When you think of growing potatoes, the image conjured up is likely that of a farmer on a tractor harvesting acres of spuds somewhere in Idaho. Thankfully, there is an alternative that provides aspiring potato “farmers” with a space-saving solution — a bag. And while a special potato grow bag is great, you don’t need a fancy, special bag, however, or even a bag for that matter. You can use a sturdy plastic garbage bag, a burlap bag, or even a cardboard box. Instead of tilling through farmland to find your spuds, you only have to dig into the dirt of your grow bag (or box) to pull out a potato… And how easy, and budget-friendly, is that?
Even though you don’t need special potato bags, they are inexpensive and include some helpful features, like a Velcro flap for easy accessibility. The Velcro flap on the side of the bag allows you to access the new potatoes easily from the sides of the bag without disrupting the rest of the plants as they are growing. Check out these highly rated, BPA-free polypropylene grow bags with nylon handles for easy lifting.
What Kind Of Potatoes Can You Grow In Bags?
While you could technically plant any potatoes that sprout (chit), it is best to start with organic potatoes since they are more likely to be disease-free. In addition, many non-organic grocery store potatoes are sprayed with anti-sprouting chemicals, which will seriously hamper any efforts to sprout and grow them.
It is ideal to plant your potatoes whole, but large potatoes can be cut into sections that are at least two ounces in size. They should also contain at least two “eyes” before they are planted in the bag. The “eyes” are important because they are the dormant buds from which the potatoes will shoot.
The potatoes, both whole and cut, will need to sprout before planting, and I discuss this further in the next section.
Experiment With Different Potato Varieties Using More Than One Bag
Consider using two or three bags and growing a different variety in each. Place them on your patio or deck and expect to harvest between 30 to 50 potatoes from each bag!
Grow Potatoes In A Bag: A Step-By-Step Guide
1. First Sprout Or Chit Your Potatoes – What Does It Mean To Sprout Or Chit Potatoes & Why Do It?
Sprouting, also known as chitting, potatoes simply means encouraging potatoes to sprout prior to planting. It also helps reduce harvest time by about two weeks. Plan to sprout your potatoes a few weeks before you intend to plant them. Sprouting often happens unintentionally when you move old potatoes from a cool location to one where they are exposed to lots of natural light for three to four weeks. You will often notice that the sunlight has caused green sprouts to appear. Rather than discarding them, use these sprouted or chitted potatoes for your potato grow bag.
To get these same results intentionally, just place potatoes in a warm location, around 70 degrees F, for up to a month, or until you see the potatoes have grown sprouts that are thick and at least a half-inch long (1.5 cm).
You can plant whole potatoes or cut them but be sure each piece contains at least two or three “eyes.” Also, any cut potatoes should be left to dry out or “cure” for a couple days before planting.
2. Prepare, Make Sure Potatoes Are Ready & Place Potatoes In The Bag (Or Box)
First, take a pair of scissors and poke a couple small drainage holes in the bottom of your bag or box. Position the bag on your patio or deck in a spot where it receives at least six hours of full sun. When the potatoes are ready, when the shoots are about a half an inch to an inch long (1.5 to 2.5 cm), fill your bag with at least six inches of compost-enhanced potting soil or approximately one third of the size of the bag. Position about three to five sprouted potatoes on top of the soil with their “eyes” pointing up. You can dust the potatoes with some garden sulfur to prevent fungal growth. Cover fairly shallowly with another four to six inches of soil, and water well.
Water & Sun
Water throughout the season, since the bag can dry out quickly from the amount of sun it receives. However, always make sure the soil feels moist but never soggy; and continue to monitor the bag regularly to ensure it’s never too dry or soggy from insufficient drainage.
The black garbage bag will hold in the heat and help your potatoes grow even faster than if they were in the ground.
Air Circulation
Also, make sure the bag is left open to get plenty of air circulation and prevent rotting. However, if a bad thunderstorm or high winds threaten, feel free to pull the top of the bag closed to protect your potato plants. Just don’t forget to open it back up once the threat has passed.
3. Wait About Three Weeks For Sprouts To Poke Through The Soil
It will likely take about three to four weeks before you see sprouts or shoots growing up through the soil and some leaves appear. As these shoots appear about six to eight inches tall, roll the side of the bag up for more support if needed and cover them with another four inches of soil, burying some of the new leaves. Repeat this process as the shoots continue to grow, adding more soil about two more times, until you near the top of the bag. Once foliage is visible, continue to water well to prevent dryness. Make sure the bag is never too soggy either by ensuring the drainage holes are not blocked.
The potato shoots will grow towards the sunlight as long as you continue to cover the new growth with soil. This gives the plants more length to grow and more space to fill with potatoes. As you see the plant bloom, just know that subterranean shoots are growing deep in the bag which will bear the potatoes all throughout the bag.
4. Harvest Your Potato Crop – How Do You Know Your Potatoes Are Ready For Harvesting?
In about twelve weeks, or about two to three weeks after you have observed your potato plant’s flowers yellow and die off, gently dig into the soil. If the potatoes are unusually small, allow them to continue growing for another week or so and check on them again. If they have reached their expected size, simply dig them out using a shovel, or empty the contents into a large bucket where you can see them and harvest them. Now, enjoy!
Enjoy The Superior Taste & Nutrition Of A Home-Grown Potato
Not only will you find the taste of a home-grown potato far more delectable than a store-bought one, but the nutrient value is far higher when fresh from the soil.
TIP! Add the old compost and spent potato plant to your compost pile for future use.
5. Store Your Potatoes
What you don’t use, simply store in a cool, dark, dry place, such as a basement corner, which acts like an old-fashioned root cellar. If you don’t have a basement, use a closet or a cupboard as long as it gets some ventilation, but no direct sunlight.
Do not wash any potatoes until you are ready to use them or you will shorten their storage life.
**Now, save even more money & eat better by growing your own delicious organic tomato crop in containers in hardly any space… find out everything you need to know right here.

Conclusion: Grow Your Potatoes In A Bag For An Easy, Inexpensive Home-Grown Potato Harvest
Now that you know how simple, easy and economical it is to grow your own amazing crop of potatoes from just a couple spuds, you won’t ever settle for store-bought potatoes again. Whether for taste; nutrition; to limit your consumption of pesticides; or to save money and be self-sustaining, there are numerous reasons to “grow your own” produce.
Bookmarking this page and following these simple tips makes it easy to grow your own potatoes in a bag even if you live in a big city with only a sunny balcony… No excuses. Get started today for access to the freshest produce right at your doorstep.
Do you grow your own potatoes? Tell us your favorite growing method here in the comments.


You May Also Like

How to Make A Bromeliad Kokedama Hanging Moss Ball for A Beautiful Vertical Garden
March 18, 2022
Frosted, Whipped Lemonade Like Chick-fil-A But Better: A Lemonade Creamsicle Made Naturally
July 22, 2021