How To Easily Remove An Orchid From A Tree Even If Its Roots Are Well-Attached
Easy Step-By-Step Guide on How to Unmount an Orchid from a Tree to Relocate It
Orchids mounted on trees or rocks are an awesome display of nature at its finest and most beautiful. Emulating how tropical orchids grow in the wild, orchids grown on trees and other objects add an uncultivated, wild and effortless vibe to your garden; even if you know your orchid had some help attaching itself. Orchids also love being mounted and quickly embed their roots into the bark of a tree or crevices of a rock. Not to mention, the arrangement makes caring for orchids easy. While this is all good, occasionally, there will come a time when you must remove or detach your orchid from a tree or other object on which it is mounted. Whatever reasons prompt this move, know that the process of detaching an orchid’s roots doesn’t have to be difficult – even if it looks that way.
In this post, I will show you just how to remove even the most attached, stubborn orchid roots from a tree as effortlessly as possible, so neither your orchid nor tree is harmed. These tips also apply to orchids mounted to other objects such as rocks or ledges.
But first, a couple reasons why you may have to unmount an orchid… To skip directly to the removal instructions, scroll down to, “How to Easily Remove or Unmount an Orchid from a Tree Step-By-Step.”
**Discover three different methods to grow orchids on trees here…
Why Remove an Orchid from a Tree & Relocate It?
Anything from a change in weather conditions to a change in tree conditions can necessitate detaching your orchid from its tree “house” or other mount it is attached to.
Too Much Sun
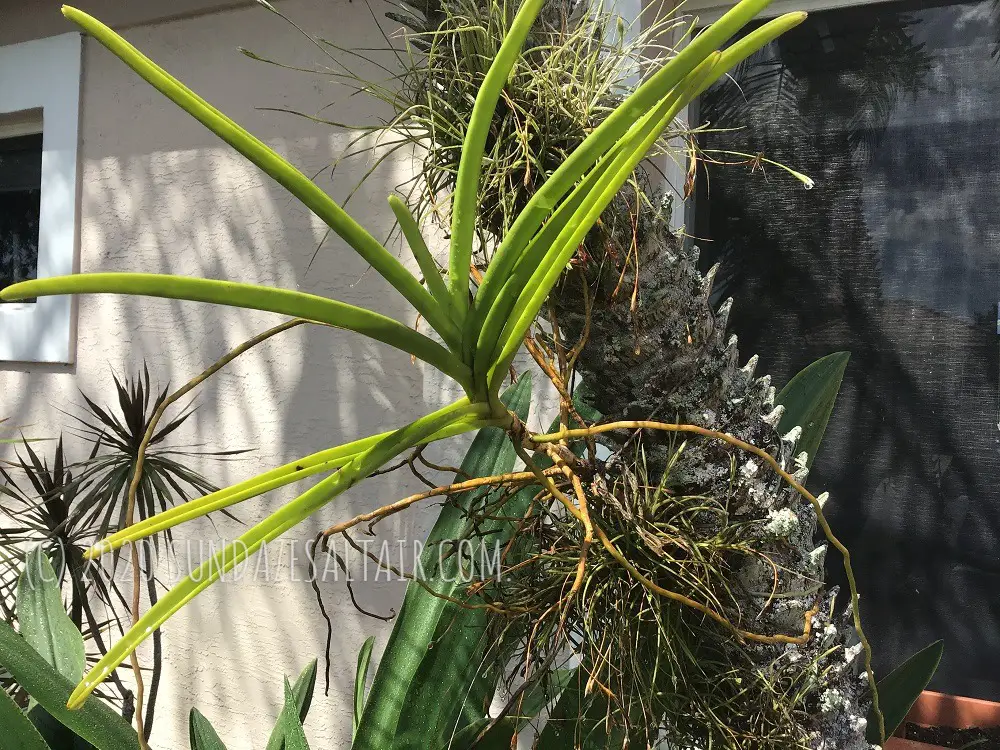
You may discover that, while your orchid thrives in a certain location for part of the year, a season change has now rendered this location undesirable. This happened to one of my otherwise successful vandas. This particular vanda thrived for most of the year, growing and attaching numerous new roots to its tree mount. Then an ultra- intense summer rolled around, and the once ideal location became bathed in brutal direct sunlight.
A slightly Southern-facing location can become too harsh for a mounted orchid in summer, especially if its tree is pruned and no longer as shady. While many of the roots wrapped about the tree were still very healthy, the roots in the path of direct summer sun began to turn brownish and dry. The “sunburned” roots prompted me to quickly relocate my vanda before any further damage was done.
Cold Weather or Impending Storms
Too much heat is bad, but too much cold can also be harmful. Another good reason to potentially remove your orchid from a tree and relocate it is in the event of a prolonged cold spell. In temperate climates, dropping temperatures can pose a threat to the health of your orchid, so make sure you are prepared for your area’s first fall frost or freeze by relocating your orchids or covering them, as I discuss here.
**How Cold Is Too Cold for an Orchid? Click here to find out…

In the tropics, we have hurricane season to contend with. Part of our hurricane prep includes bringing all plants inside – potted and otherwise. Hurricane-force or even tropical storm winds can damage your orchid or blow it away to oblivion, the water or neighbors, never to be seen again. Of course, a lot depends on how well your orchid is mounted, as well as how severe the forecast storm is.
The Mounted Arrangement Does Not Meet Your Orchid’s Water Needs
A mounted orchid will either have to be located in a climate with sufficient rain such as a tropical climate, or it will have to depend on you for its hydration. If you live in a dry place, or if you are unable to water your orchid often enough, growing orchids attached to trees may not be the best idea. In such dry situations, potting your orchids, or hanging your orchids in baskets, may make it easier to quench your orchid’s thirst.
Changes In the Condition Of The Tree Or Object Your Orchid Is Mounted On
Perhaps the palm tree your orchid is attached to has fungus problems. Sometimes a tree gets a pest problem or starts rotting and the tree must be cut down. Or maybe you discovered your orchid is in a location on a tree where it is vulnerable to dangerously heavy falling palm fronds. Whatever the case, save your orchid by removing it as discussed in the steps below.
If You Move Or Otherwise Change Your Circumstances
Maybe you sold your home and don’t want to leave the orchids you cared for behind to a new owner who has no use for them… Or maybe you simply want to change the way you grow your orchids. Have no fear, you can easily unmount your orchid without harming your tree or roots by following these tips…
********
How To Easily Remove or Unmount an Orchid From a Tree Step-By-Step:
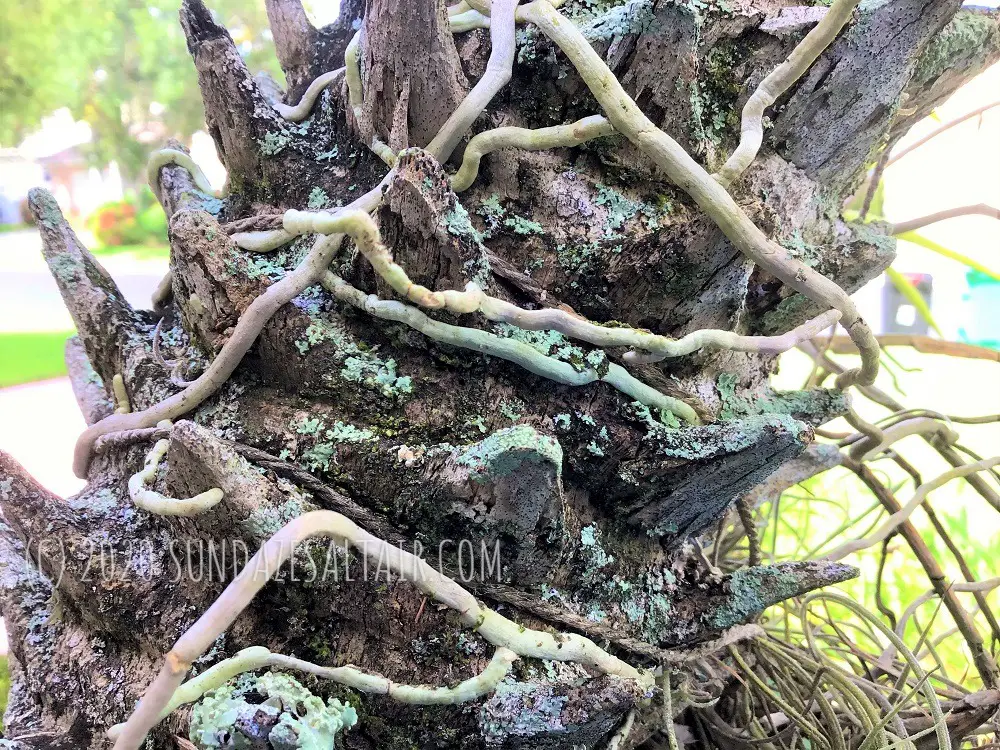
As you can see from the photos illustrating this story, the vanda orchid featured here has numerous aerial roots thoroughly attached to the highly textured bark of a Robellini palm. Orchid roots attached to rougher surfaces often will cling more tightly, including orchids attached to cork mounts and rocks with crevices. Orchids attached to smoother surfaces like clay will usually be easier to remove. Since orchids with a lot of well-attached roots embedded in tree bark are usually the toughest to remove, I bring out the “big guns”… well, actually more like a hose for a simple strategy I like to call the “water method.”
Of course, if you are willing to lose some roots, you can sacrifice some with a hasty removal method and your orchid will still likely recover, but I prefer to preserve as many roots as possible….
Follow The Water Method To Detach Your Orchid Fast & Save More Roots
An orchid’s roots are its lifeline, and more roots also leads to faster blooming. So, here is the super simple “water method” to save your orchid’s roots while expending minimal effort:
Step 1: Remove Any Ties That Bind Your Orchid To Its Tree
First, remove any string, twine, wire or tape that was used to attach your orchid to its mount. Use a pair of scissors to simply snip any string, tape or twine. In the case of wire, either use wire cutters or untwist the wire to release it. Even without its ties, it is likely your orchid won’t budge. By now, your orchid has likely been thriving on its tree under natural conditions and has many new roots securely attached around its perch. Don’t worry though, the next steps will help you detach even the most stubborn orchid roots…
Step 2: Wet Or Dry Orchid Root Removal?
I have tried to detach both wet and dry orchid roots, and let’s just say wet roots are much more pliable and easier to detach. Well-hydrated orchid roots become flexible and less prone to breaking, so you will lose less of them. Plus, the tree bark also absorbs water causing the bark to slightly swell. This swelling action further helps your orchid’s roots to almost pop off when you apply a bit of pressure. Thus, the secret to making everything pliable and easy to manipulate is a thorough soaking of both the roots and the tree…
Dry Orchid Root Removal? Using An Implement?
I have tried to remove dry orchid roots from trees as well. The roots were not flexible and did not detach as readily as wet roots, requiring more effort as stiffer roots are more prone to breakage.
I know someone who removed dry orchid roots from its tree using a razor to gently lift the roots. While a sharp object can be used with care, this method should not be first choice due to risk of injury. Wet roots are flat-out less work and easier to manipulate using just a fingernail — no other tools required.
Bottom-line: Whenever possible, soak the roots & tree to make less work for you, & less damage to your orchid.
Soak Your Orchid’s Roots & Bark… Or Wait Until After A Heavy Rainstorm
While you could take a hose and soak the roots, to get optimum hydration, you need to soak the roots and tree for a good couple of minutes. This ensures you will have a level of saturation where the roots are green and pliable and the bark has also absorbed water. For this reason, and because it is very time-efficient, I like to wait until after a rainstorm has passed to let nature do the soaking. Plus, I find cooler post-storm conditions to be ideal for unmounting orchids.
A Rain Storm Makes Root Detachment Less Painful For You & Your Orchid
Recently, I removed an orchid after a bad thunderstorm blew through. Not only were the post-storm cloudy, cool conditions ideal for root detaching, but the well-soaked roots peeled away effortlessly. Even ones tightly affixed to the crevices of this highly textured palm came off with ease.
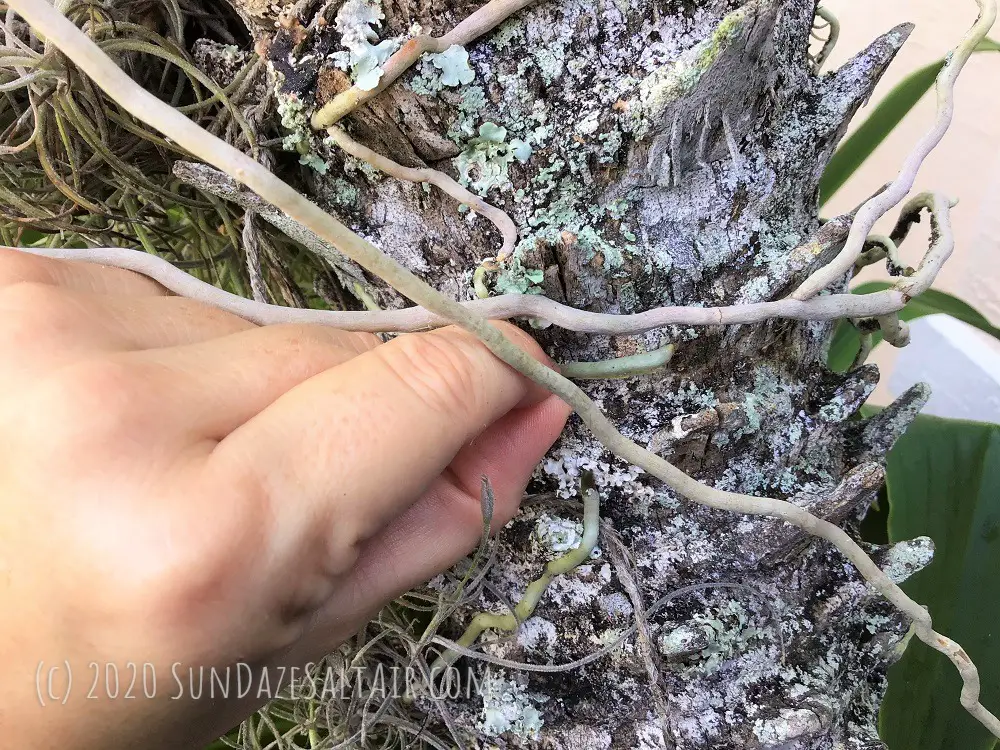
Step 3: Apply Gentle Pressure To Attached Roots
Now that the water has soaked everything and done much of the work for you loosening your orchid’s roots, begin to detach the roots by gently pulling them. Start further away from the orchid and follow the direction of the root to “unravel” them.
Spray From A Water Bottle As Needed To Dislodge Stuck Roots
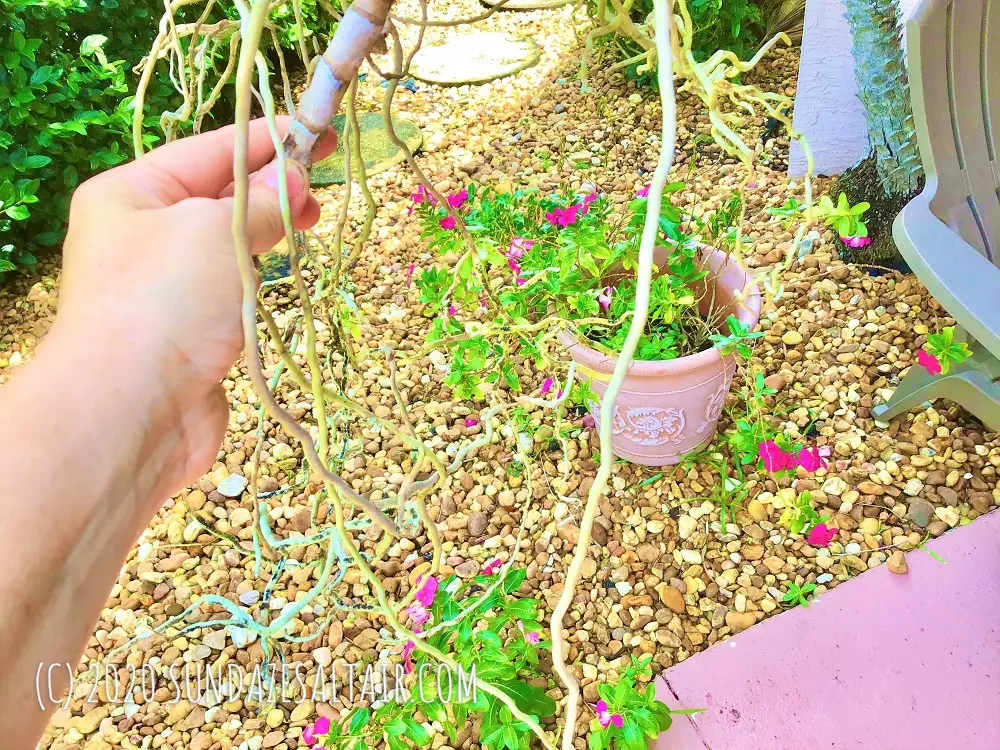
Continue to apply gentle pressure to coax the roots away from the bark one at a time. You should find well-hydrated roots slide easily off the tree with minimal pressure. For roots that are still stuck, take your time to carefully and gently lift them away from the bark, helping them out by spraying the water bottle to further dampen and dislodge them.*** Follow the roots, moving along around the tree until all are detached and your orchid falls away.
***For roots that are so entwined in their wood or cork mount, but extraction is absolutely necessary in the case of disease, you will have no choice but to sacrifice some roots. In this case, use a sterilized sharp object, such as scissors or a knife, to cut the orchid roots as close to the mount as possible. This way, you will harm the fewest amount of roots and do the least amount of damage to your plant.


You May Also Like

A Gardener’s Diary… On Growing Orchids And Five Common Orchid Myths
July 25, 2020
Why Are The Leaves Of My Orchid Wrinkled & Leathery, & How To Fix Them
June 9, 2021